Welcome to my blog!
It's all about whimsy, art and Halloween!
Showing posts with label Halloween Crafts. Show all posts

Saturday, October 27, 2012

31 Days of Halloween - Day 28 - Blinged Out Witch's Hat


And here we are on day 28! Yea!  And you are hopping onto the Smeared and Smudged Forum's 31 Days of Halloween Blog Hop! Yea!  I love all the wonderful projects that I'm seeing on my daily hops!  Take a bow, Wicked Bloggers!

Below are all the fabulous bloggers:


What does every witch need to shine at a Witch's Tea? A fabulous hat! I started with a cool hat I found on line after last year's Witch's Tea, for a huge discount! That was my very first Witches tea and I wore a hooded cloak, which I love, but...there was a best hat contest! Who knew! So, as I said, I started with one that was already cool and had a ball blinging it up!
Materials:
A pointed hat
Hot glue
Feathers
Wire
Beads
Bangles
Knick knacks, doo dads and glitter glue
Here's my cool hat.I love all the black gauze and and bent over point!
You may recognize many of the bling I'm adding as Halloween projects from earlier in the October.This is the first bling - a small bat pendant with a skull bead dangle. I sewed it on to make it easy to switch out for next year's tea.
I cut 6 3" to 4" strips of tulle 36" wide and tied them in a bow.
I hot glued the bow on the back and added this bauble.It's Smeared Ink's It's About Time Pocket Watch stamp glued on the back of a glass blob. I added glitter glue to the tulle.
I glued feathers all the way around and sewed on a pendant piece and added wires that I curled up and attached dangles to.

31 Days of Halloween - Day 27 - Edible Zombie Morsels


Ahh!  It's day 27! That's right, and you are hopping onto the Smeared and Smudged Forum's 31 Days of Halloween Blog Hop! Yea!  I love all the wonderful projects that I'm seeing on my daily hops!  Take a bow, Wicked Bloggers!

Below are all the fabulous bloggers:


Now will come the making of the zombie candy! Muhuhuahahahhhh! No baking required, but you do need clean hands, warm pockets and fruit flavored Tootsie Rolls!
Materials:
Tootsie Roll Fruit Flavors - make sure the mix includes vanilla
Tootsie Rolls take a little time and moderate strength to condition, so the first rule of Tootsie Roll Sculpting is: 
Put the wrapped candies in your pockets for at least half and hour before conditioning it.
 Rule 2:
The Tootsie Roll will pretend it doesn't want to stick to itself at first. After a moment, you won't be able to separate it!
Condition them as you would polymer clay - smooshing and rolling them in your hands until they are soft enough to shape.
For a toe, you will need 2 green, a tiny piece of white, purple and pink.
Combine the 2 green and shape into a cylinder.
Flatten and widen one end.
Roll the purple and fatten it into a circle, place it on the toe and tear the end away to make a gross toenail.
Make a button shape with the white and push it in the back of the toe.
Roll a tiny piece of the pink and lay it around the white.
You can put some pink under the toenail if you like.
For an eyeball, you will need 2 white, 1 pink and a tiny bit of blue.
Combine the 2 white pieces and roll into a ball.
Twist all but a little of the pink to make the root and then roll small strings to to make veins.
Mix a tiny bit of white and blue together to make a hazy looking iris.
For the teeth I used 1 white mixed with 1/2 a yellow for the piece of bone, yellow for the teeth and a bit of pink for the little bit of gums.

The brain bit is a blue and white combined. Make a random lump and roll the rest into a long string to wind back and forth all over the lump.
And there you have it! Zombie Morsels! Oh, and the slogan is:
Zombie Morsels
When you care enough to send the very beast

Saturday, October 20, 2012

31 Days of Halloween - Day 21 - Frankie Door Hanger


It's day 21 of Smeared and Smudged Forum's 31 Days of Halloween Blog Hop! Can you believe it?  It's going by so fast!  I love all the wonderful projects that I'm seeing on my daily hops!  Take a bow, Wicked Bloggers!

Below are all the fabulous bloggers:
By now, you know that I save - nay- seek out fun tissue boxes. The whole sides are usable for just about anything, but the overlapping sides are only partially useable. Well I liked this little guy enough to carefully take him apart and put him back together. Apropo, no?


Materials:
Halloween tissue box
Scissors
Hole punch - 1/8" - I used the small hole punch on my Cropadile
Grommets
Cropadile or grommet setter
Glitter glue - I used black to make the "stitches"
20 Gauge wire
Headpins
Wire cutters
Round nose pliers Beads

1. Cut out your focal panel and decorate with glitter glue if desired and allow to dry.
2. Punch 2 holes toward the outer edges on the top and punch 5 holes on the bottom edge.
3. Add grommets to the holes.
4. Cut a 16" piece of wire and fill half way with beads.
5. Slide all the beads to the middle of the wire and put the wire tails through the top 2 holes from back to front.  6. Use the round nose pliers to start a spiral on the wire tails and roll them up to the holes.
7. Make or buy 5 charms. If you make them, slide 2 or 3 beads on a headpin and make a large loop.
8. Slide the charms though the grommets on the bottom and wrap the wire tails around to secure.


Tuesday, October 16, 2012

31 Days of Halloween - Day 17 - Day of the Dead Cameo


Yea! It's day 17 of Smeared and Smudged Forum's 31 Days of Halloween Blog Hop!   This has been so much fun, hopping and commenting AND I thank everyone for the awesome comments you've give me! 

Dia de los Muertos. or Day of the Dead, is a wonderful, colorful celebration of life. In the days of celebrating, people groom the gravestones of loved ones, hold candle light vigils, break bread and share memories.
The skull is a symbol of loved ones passed and is loved, not feared. It can be a super fun decorated sugar skull that is made even more exciting if it has your name on it! It can be part of a vignette with whimsical skeletons portraying loved ones' occupations and family gatherings. 
My shrink plastic sugar skull sits atop a piece of polymer clay mounted on a cardboard pendant.

Materials:
Cardboard - a cereal box or something similar will work
Aleene's Turbo Tacky Glue
Die cutting machine
Sizzix Frame and Flower die
Black paint
Inka Gold metallic paste - Copper
Shrink plastic - white
Martha Stewart Skull Punch
Permanent markers - fuchsia, purple, blue, orange, lime green and black
Polymer clay - a small amount of black
Clear gloss sealer
I used Sizzix Frame and Sculpted Flower die to cut 3 frame pieces from cardboard.
Glue all 3 pieces together and allow them to dry.
Paint the cardboard with black acrylic paint and allowed it to dry.
I used my fingers to apply a thin layer of the copper paste so that some black showed through.
Condition a small amount of black clay.
Click here to see how I made the sugar skulls
The skull had a hole in the top to put a jump ring in.
I chose to cover it with a tiny gem.
Form the clay into an oval that fits inside of your frame and is big enough to put the sugar skull on. Bake the clay as directed.
Cover the black backing with clear glossy sealer and set the skull in it.
Add a bit more sealer on the skull. I can't wait to make this into a necklace!

Tuesday, October 9, 2012

Skunk in a Punkin


It's day 10 of Smeared and Smudged Forum's 31 Days of Halloween Blog Hop!  Yea! 
Below are all the fabulous bloggers:
I started a handmade Halloween photo album seven years ago. I have lots of pages, but I just never put it together. I decided to add a photo inside of a pumpkin to one of the pages. The pumpkin will open as if it were a jack-o-lantern. Just slide the top off and there's that little stinker
Materials:
Decorative papers
Photo Paper Pumpkin - I used a photo of a pumpkin I made at least 1 1/2" wider than the photo Aleene's Double Stick Tacky Sheets Scissors

I started with a small photo of my grandson, a lovely grouping of decorative papers, Aleene's Double Stick Tacky Sheets and a photo of a pumpkin.
Before trimming the photo cut a piece of the Tacky Sheet as big as the untrimmed photo.
Peel off one side of the Tacky Sheet and affix it to the back of the photo.
Cut the top off the pumpkin, making sure that the width of the top is at least as wide as the photo.
Lay the top of the pumpkin on a piece of yellow paper and trace.
Cut the yellow paper and stick to the back of the pumpkin top, offset as it is in this photo.
Sandwich the photo between a sliver of the top of the pumpkin and a piece of pumpkin colored paper. Measure the width of the photo on the back of the pumpkin and add Tacky Sheet to the outside of the photo.
Here is the finished page.This is the year that I will finish this album!

Thursday, October 4, 2012

31 Days of Halloween - Day 4 - Bat Barrette


It's day 4 of Smeared and Smudged Forum's 31 Days of Halloween Blog Hop! 
Below are all the fabulous bloggers:
Okay, it's not so spooky but it is sparkly! And it's super easy to make, too! This was inspired by Tiffany Windsor's Felted Floral Headband from last week's show. Grab some felt and craft foam and get to makin'!
Materials:
Aleene's Fabric Fusion Peel and Stick Sheets Aleene's Super Gel Glue
Felt
Black craft foam
Inka Gold orange metallic paste
Scissors Barrette base
Bat Template - the 1st click takes you to where I work, click again on the small print bat template to open it
Cut 4 different size circles of felt the largest of which will need to be 1/2' wider than the barrette base.
Cut from the outer edge of each circle to toward the center ending 1/2" from the center.
Cut points or rounded ends on each petal.
Cut a strip of felt 3/4" x 2".
Cut a craft foam bat using my print out.
Using your finger, brush a very small amount of metallic paste to the tips of the flowers.
Cut strips of the Fabric Fusion sheets to fit in the center of each flower circle, on the back of the bat, on the barrette base and felt strip.
Stick all the layers together and stick the flower to the barrette base.
Put the felt strip through the underside of the barrette and stick to the bottom of the flower.
Add jewel eyes to the bat and you're ready to wear it!

He is available in my Etsy shop
DeliciousMischief


Monday, September 12, 2011

Monday on the Bone Tree - Zombie Coffee Mug Pendant

Zombies and coffee cups!  I know, right?!  The fun part is the zombies came FROM the coffee cups!  Read all about it on my Etsy shop - DeliciousMischief.

Wednesday, September 1, 2010

Halloween Giveaways at PFATT

You have got to go see this web site!  Who knoew there were so many Halloween artists! 

Tuesday, February 16, 2010

Ghouls Gone Wild

This is my interpretation of the February C4 Challenge
 Holiday Fusion.
This ghoul has had tee many martoonies and is lifting her sheet hoping to collect more Mardi Gras beads!
She's made from transparent polymer clay, wire, feathers and beads.

Tuesday, October 27, 2009

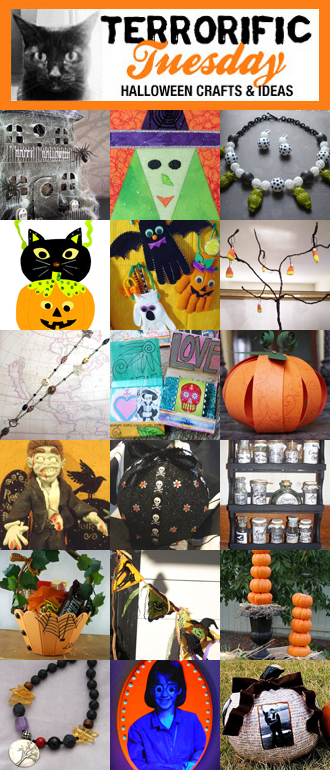
Terrorific Tuesday 2009 Week 4

terrorifictuesday-week-4

Trick or Treat!
Frame and post it note holder dressed for Halloween

Costumed Kokeshi Dolls
Try out a Halloween idea for a traditional Japanese doll with Crafterella

Halloween Mask
Phyllis Dobbs created a fun and easy Halloween mask - great for adults and kids!

Fun Halloween Lanterns
Stephenie Hamen accessorizes plain paper lanterns with her paper punches.

Black Widow & Bloody Necklaces
Pattie Wack uses 3-D paint to create chokers that will creep out your party guests!

Tutu Cute Halloween Wreath
Vanessa creates an inspired wreath made of tulle!

Mad Scientist Party
Amy of Living Locurto shares a slew of fun ideas to host your own Mad Scientist Party.

Halloween Zombie Dolls
Crafty Chica shows how to add some zombie love to your decor!

Halloweenies!
Boopsie Daisy shares some of the wonderful Halloween dollies that she dreams up!

Crafty Chica's Ghost Story!
Kathy Cano-Murillo shares a haunted crafty tale!

Halloween Cone Witches
Make these cute little paper cone witches for Halloween!

Halloween Leftovers
Mel takes the leftovers from last week's project and makes a cool Goth choker!

Brenda Pinnick Halloween Owls
Seasonal Owls for Scaring or Delighting Trick or Treaters

The Impatient Crafter
Margot creates another spooktacular mixed media necklace with a bite.

Halloween Batty Windchime
Heidi Borchers creates a super cute windchime with personality!

Kitschy Kitschy BOO
Add some Halloween flair to your day with this cute kitschy bracelet and earring combo!

Simple Halloween Gift Tags
Studio Mama makes a strong impact with these quick and easy tags!

Strands of Beads
Melissa once again gives some pretty flower beads a Gothic makeover with this simple earring design

Costume Fun
Sharron Westerfield shares her passion for costume-making and the joy it brings her grandchildren.

Return of the Birthday Zombie
Candace is cracking herself up with this ghoulish gift box idea

Doodle Pumpkin
Swelldesigner a.k.a. Alexa Westerfield shows you how to make a fun pumpkin on the fly!

Tuesday, October 20, 2009

Terrorific Tuesday 2009 Week 3

terrorific-tuesday-week-3

Spooky Spider House
Silvia creates a miniature haunted house that is spooky and oh-so fun!

Witchy Embroidered Postcard
Sharron Westerfield brews up a whimsical witch postcard

The Impatient Crafter
Vintage plastic owls become the focal point of a charming necklace you can wear for Halloween and all year round!

Pumpkin and cat felt treat bag
Felt bag that can also be made as a wall hanging or door hanger

Cheryl Ball's Halloween Door Hangers
Create these door hangers from inexpensive gloves for Trick of Treaters

My Big Mouth
Make a creepy wire tree just in time for Halloween!

Mel's Day of the Dead Necklace
Linked chain, skulls and spiderwebs for Dia de los Muertos

Crafty Chica's Matchbook Shrines
Adorable little folding shrines that fit in your pocket!

Paper Pumpkin
Make a plump paper pumpkin from some strips of paper plus a little Halloween craftiness!

Polymer Clay Zombie
Candace's diabolical plan to populate the world with zombies continues!

The Impatient Crafter for iLoveToCreate
Make a retro style styrofoam ornament into a fab Halloween Party centerpiece! Madge shows you how using iLoveToCreate products!

How to Make a Spooky Spice Rack
Come make a spooky spice rack with Crafterella, she's sharing her unique labels with everyone!

Halloween Treat Tote
Conjure up a quick Halloween cupcake basket using new ScoreBoard dies!

Brenda Pinnick's Halloween Banner
A little scary, a little fun, this delightful banner celebrates all things Halloween. Made using Brenda Pinnick Sizzix dies, glitter and ribbon.

Creepy Candlesticks
Pattie Wack turns mini pumpkins into a boo-tiful Halloween lighting idea!

Strands of Beads
Melissa explores the holiday possibilities in a black and white checkered bead

Glow in the Dork Wall Hanging
Turn off the lights and have a laugh with this goofy wall hanging from Alexa Westerfield!

Picture Perfect Pumpkin
Vanessa Coppola turns a traditional pumpkin into a decopauged masterpiece!

Friday, October 16, 2009

Return of the Birthday Zombie

DVD Gift Box

This is a polymer clay zombie that I made for my dear friend, Beth. She and her family love zombie movies, so I came up with an idea to make the gift as cheesy as a great zombie flick. I made the zombie using polymer clay. See the Polymer Clay Zombie blog entry from last week's Terrorific Tuesday post to learn how to make your own zombie. I made him one half of an Origami box to stand in, but you could use any box. I used some Photoshop techniques on a photo I'd taken of a graveyard for the background. I tore the edges and browned them up with a sienna stamp pad and glued the pieces to the back and sides of the box.

Next I composed the following letter to go with it. If you're a zombie officianado you'll see where this is going. If you're not, I'll say this: George Romero made the first zombie classic Night of the Living Dead - It takes place in a small town in western Pennsylvania - If you're bitten by a zombie, you become one (some consider this the Zombie Virus) - Where ever zombies go there is mayhem - The most famous line from the movie is "They're coming to get you, Barbara".

Here's the letter:
Dearest Beth,

I was looking on line and found this killer cake decorator, Barbara, who makes these fabulous cakes. She works at a place called Romero’s, in a small town in western Pennsylvania. I called her up and told her about you and the kind of things you like. I was so excited! She said she’d make something spectacular for you. So, yesterday I got this strange email from the owner of the bakery:

Dear Candace,
You should know there’s been a terrible virus going around our town. None of my staff showed up at all today. Barbara started your cake, but couldn't make it in either. There are several fires in town and things are a mess. I called my delivery guys, who said they could go pick her up. I called her and said “They’re coming to get you, Barbara”, and she screamed and hung up. She never showed and I can’t get hold of the delivery guys, either. I’ve finished the cake myself and will deliver it personally. I hope it will meet your approval.
Sincerely,
George

So, in the process of moving to Utah and, yes, that's my excuse - I missed Beth's birthday. As I was putting together ideas for Alexa Westerfield's Terrorific Tuesdays, I printed photos of the birthday zombie and made them into earrings. See the SugarSkull Bracelet & Bats in the Belfry Necklace, and Candy Corn Riot Earrings blog entries, if you want to use this idea. They have all the directions you might need for shrink plastic and earring making. With one exception - to make your earrings from a photo, you'll need the inkjet printable shrink plastic.
I figured I'd send along a note set up like a movie poster and title it:
RETURN OF THE BIRTHDAY ZOMBIE.

Now, I was looking around the house for a box to send the earrings in and then it hit me - I had some old DVD cases that I'd been saving for some scathingly brilliant idea, and finally I had one!
Here's what I ended up with...

The front cover says:

Return of the Birthday Zombie

Send in the Clones

The movie that no one wanted to see made

Has been Made!

See the zombie clones arrive late for Beth's Birthday!

Well, they had a really long way to walk and zombies are slow anyway!

You laugh! you’ll Cry! You’ll hurl!

The back cover says:

This film has not yet been rated

Void where prohibited by law

Do not put on these earrings while driving

No zombies were harmed in the making of these earrings

Do not wear these earrings while squeezing your head through your stair rails as they are large and might sustain damage Here's what you'll need to make your Zombie (or any kind of) Movie Gift Box.
A DVD case
A DVD
Photos that you can size appropriately
A heavy duty hole punch
Glue
Double sided craft tape
A scrap of card stock, any color
Scissors

If you don't have a printer at home, make copies at the library or neighborhood copy store. Make extras for good measure. Speaking of measuring, you'll need the measurements of the DVD case. This can be done easily by taking the paper out of the DVD cover and measuring it. Easy peasy!
I did mine with Photoshop, but I could just as easily done it as a collage. Just make sure that the collage will easily fold to slip into the DVD case, if you choose this option.
For the DVD, place a disc on your extra copy and trace around it. Cut the copy giving a bit of extra margin to trim. Now smear a thin coat of Aleene's Quick Dry Tacky Glue on the disc and put your cut image on it. Trim the edges with a craft knife and cut out the center hole.

Punch two holes to put the earrings through (if you're doing that) and tape the backs, so the earrings won't slide out. Ohh, I just had an idea! Since the center of my DVD that got cut out was a cake, I decided to add it back.
I got another copy of the photo and cut loosely around the cake. Next I used a double sided craft tape to stick the cake to a piece of card stock. Then I cut the cake out and used a sticky craft dot to attach the cake to the image just below the hole. Since the earrings are taped on the back of the disc, I want Beth to be able to take the disc out of the case. She'll press on the cake to release the disc!
Now, go! Go make your DVD case gift box! You're welcome to use the zombie letter and figure ideas, if you like!